Integrate AppBar with react-navigation
Prerequisites
react-native-paperreact-navigation
We assume that you have already installed the mentioned libraries above, otherwise please check out the guides below.
React Native Paper - Getting Started
React Navigation - Getting Started
Stack Navigator
We will start with react-navigation by creating a basic navigation stack. Stack navigator gives us a possibility of transition between screens in our app and manage navigation's history. In a simple scenario where there is only one stack navigator present in the app, it resembles a navigation state in a browser.
Screens are pushed and popped from the stack while the user navigates to a new screen or go back to the previous one.
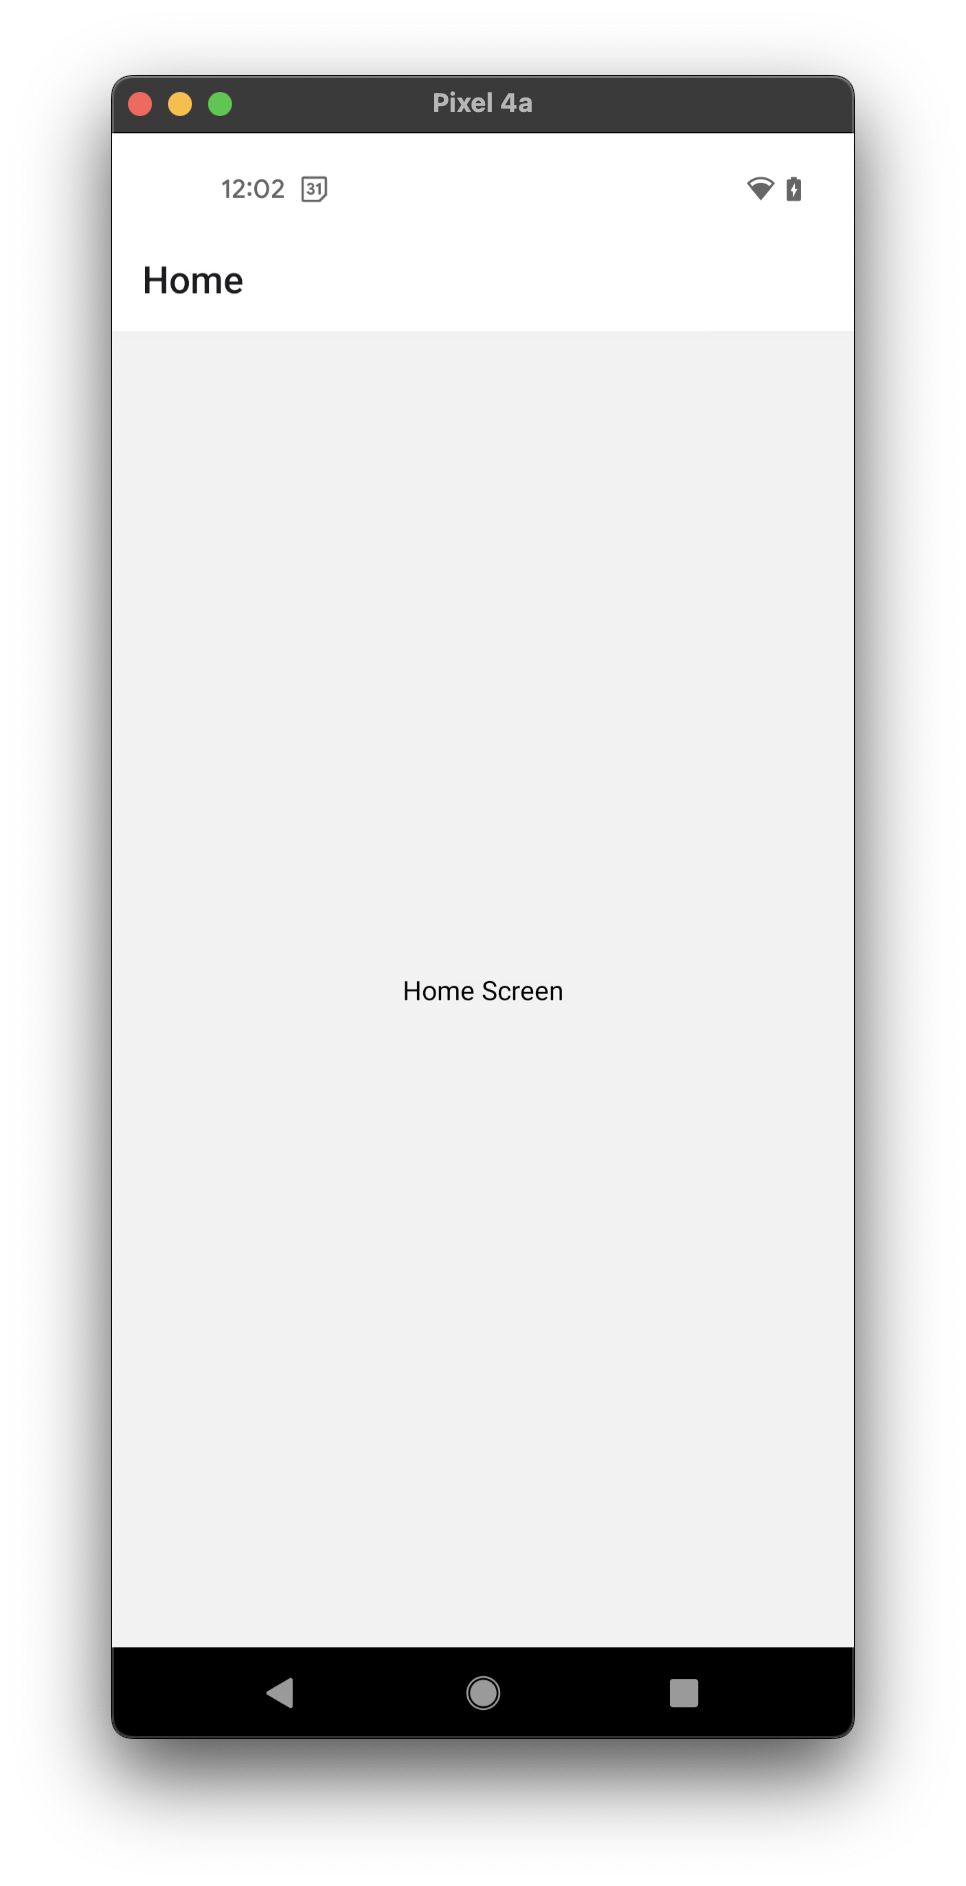
Let's create two screens. A main screen named Home and details screen named Details.
import 'react-native-gesture-handler';
import React from 'react';
import { NavigationContainer } from '@react-navigation/native';
import { createStackNavigator } from '@react-navigation/stack';

const Stack = createStackNavigator();

export default function App() {
  return (
    <NavigationContainer>
      <Stack.Navigator initialRouteName="Home">
        <Stack.Screen name="Home" component={HomeScreen} />
        <Stack.Screen name="Details" component={DetailsScreen} />
      </Stack.Navigator>
    </NavigationContainer>
  );
}
At the moment our navigation stack contains two screens and will render HomeScreen or DetailsScreen components according to the current navigation state. We have not implemented those components yet, so let's do this now:
import React from 'react';
import {View, Text, Button, StyleSheet} from 'react-native';

function HomeScreen() {
  return (
    <View style={style.container}>
      <Text>Home Screen</Text>
    </View>
  );
}

function DetailsScreen() {
  return (
    <View style={style.container}>
      <Text>Details Screen</Text>
    </View>
  );
}

const style = StyleSheet.create({
  container: {
    flex: 1,
    alignItems: 'center',
    justifyContent: 'center',
  },
});
Once we have finished implementing the components, we can run the app and check how Stack looks like.
To navigate from HomeScreen to DetailsScreen we can use the navigation object provided by Stack.Screen component. Every component rendered by Stack.Screen has an access to the navigation object via props. Let's modify our HomeScreen component:
import { Button } from 'react-native-paper';

function HomeScreen({ navigation }) {
  return (
    <View style={style.container}>
      <Text>Home Screen</Text>
      <Button mode="contained" onPress={() => navigation.navigate('Details')}>
        Go to details
      </Button>
    </View>
  );
}

const style = StyleSheet.create({
  container: {
    flex: 1,
    alignItems: 'center',
    justifyContent: 'center',
  },
});
Our result:
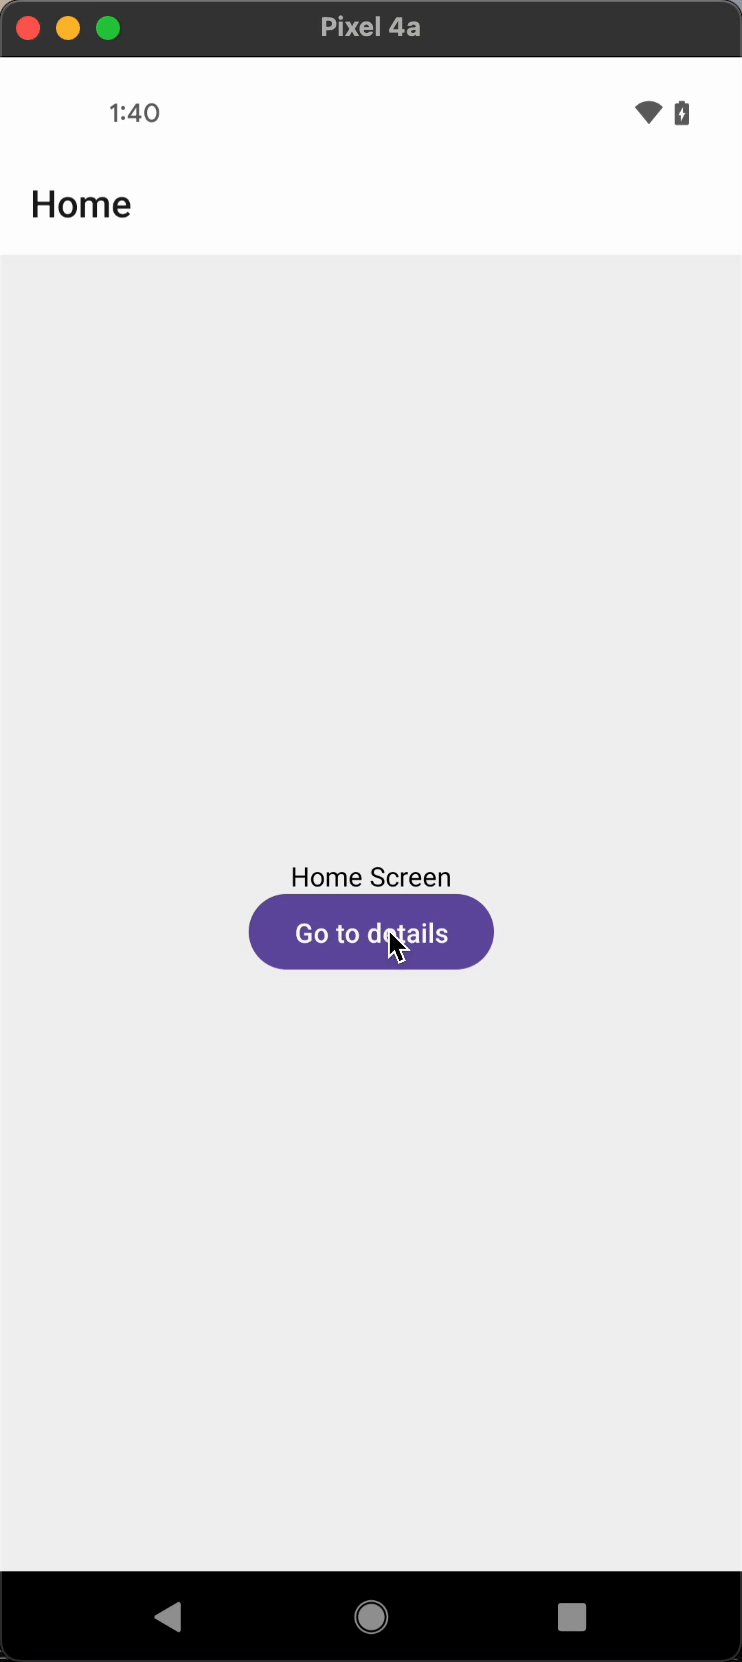
As you can see, we can already navigate between two screens. In the next steps, we will show you how to use Paper's AppBar instead of the default header.
Adding AppBar
We can customize Stack's header by passing custom component:
export default function App() {
  return (
    <NavigationContainer>
      <Stack.Navigator
        initialRouteName="Home"
        screenOptions={{
          header: (props) => <CustomNavigationBar {...props} />,
        }}>
        <Stack.Screen name="Home" component={HomeScreen} />
        <Stack.Screen name="Details" component={DetailsScreen} />
      </Stack.Navigator>
    </NavigationContainer>
  );
}
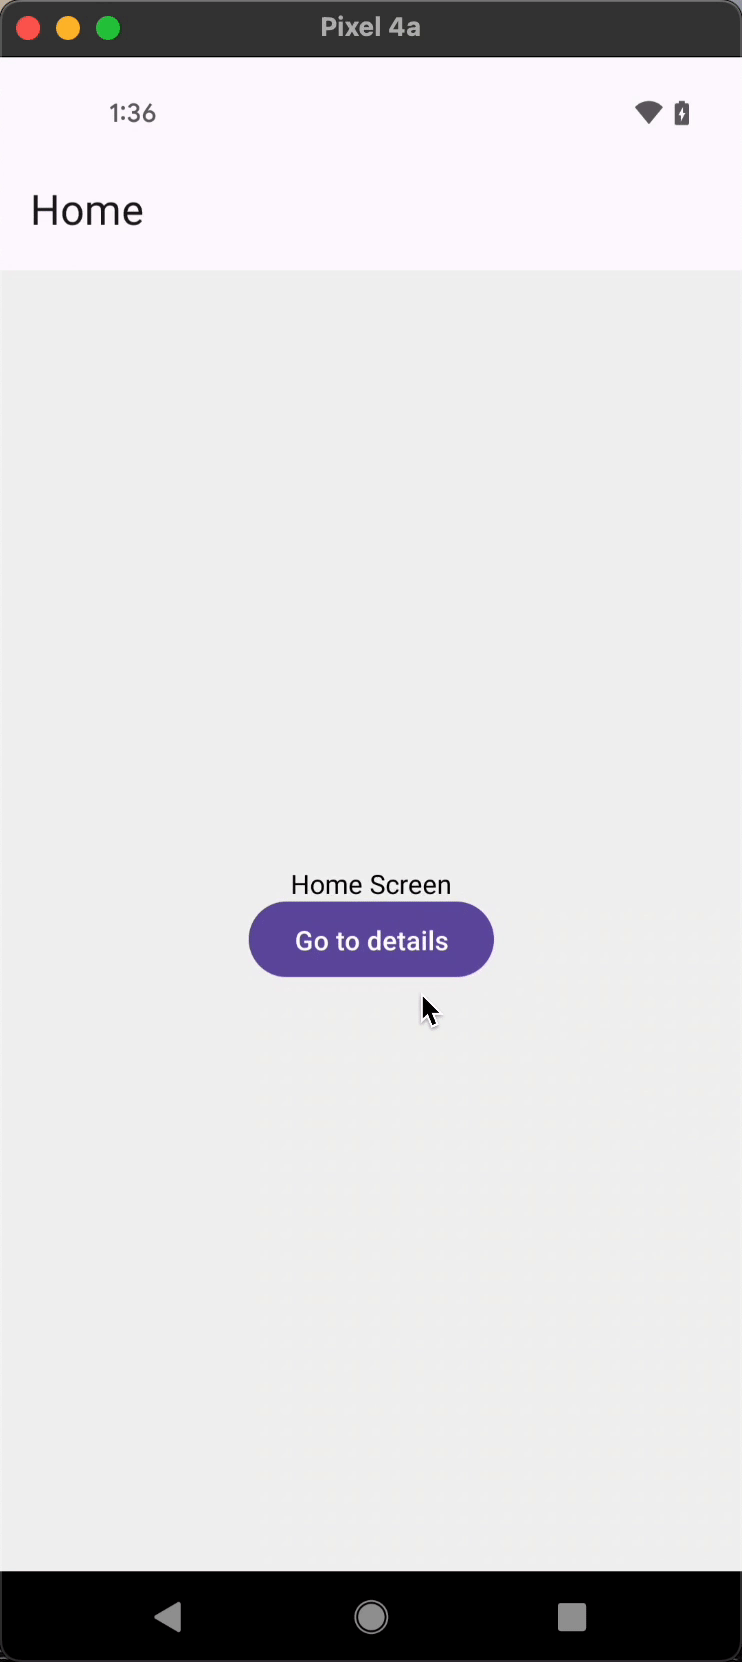
Now we will implement CustomNavigationBar using AppBar component:
import { Appbar } from 'react-native-paper';

export default function CustomNavigationBar() {
  return (
    <Appbar.Header>
      <Appbar.Content title="My awesome app" />
    </Appbar.Header>
  );
}
Current implementation of the CustomNavigationBar is simple - we just render a title inside of it, however it's hardcoded "My awesome app" text, so let's adjust it.
To automatically get the correct title for the screen, we're going to take the advantage of getHeaderTitle helper available in @react-navigation/elements in the following way:
import { Appbar } from 'react-native-paper';
import { getHeaderTitle } from '@react-navigation/elements';

export default function CustomNavigationBar({ route, options }) {
  const title = getHeaderTitle(options, route.name);

  return (
    <Appbar.Header>
      <Appbar.Content title={title} />
    </Appbar.Header>
  );
}
You may notice there is no way to go back to the previous screen, because the back button is not visible in the header. Let's add it now and let's make sure it's visible on all Stack's screens except Home screen.
In order to achieve it, we firstly check, if the navigation bar receives a back prop. If it has, it means there is another screen on the stack beneath the current screen and we should render the back arrow button in such a case.
import { Appbar } from 'react-native-paper';
import { getHeaderTitle } from '@react-navigation/elements';

export default function CustomNavigationBar({ navigation, route, options, back }) {
  const title = getHeaderTitle(options, route.name);

  return (
    <Appbar.Header>
      {back ? <Appbar.BackAction onPress={navigation.goBack} /> : null}
      <Appbar.Content title={title} />
    </Appbar.Header>
  );
}
Adding more items to Appbar
Another interesting pattern that can be implemented with react-native-paper and react-navigation is a "menu" button. Thanks to the Menu component we can add a nice looking pop-up to our Appbar. To implement this feature we need to make a couple of changes in CustomNavigationBar:
- Render a
Menucomponent - Pass
Appbar.Actionto the anchor prop - Add a state to control
Menuvisibility
To have properly working Menu component, remember to wrap your root component with the PaperProvider:
import { PaperProvider } from 'react-native-paper';

// ...

<PaperProvider>
  <NavigationContainer>
    <Stack.Navigator
      initialRouteName="Home"
      screenOptions={{
        header: (props) => <CustomNavigationBar {...props} />,
      }}>
      <Stack.Screen name="Home" component={HomeScreen} />
      <Stack.Screen name="Details" component={DetailsScreen} />
    </Stack.Navigator>
  </NavigationContainer>
</PaperProvider>
We also want the menu to appear only on HomeScreen, which means we will render it conditionally based on the back prop.
import React from 'react';
import { Appbar, Menu } from 'react-native-paper';
import { getHeaderTitle } from '@react-navigation/elements';

export default function CustomNavigationBar({
  navigation,
  route,
  options,
  back,
}) {
  const [visible, setVisible] = React.useState(false);
  const openMenu = () => setVisible(true);
  const closeMenu = () => setVisible(false);

  const title = getHeaderTitle(options, route.name);

  return (
    <Appbar.Header>
      {back ? <Appbar.BackAction onPress={navigation.goBack} /> : null}
      <Appbar.Content title={title} />
      {!back ? (
        <Menu
          visible={visible}
          onDismiss={closeMenu}
          anchor={
            <Appbar.Action
              icon="dots-vertical"
              onPress={openMenu}
            />
          }>
          <Menu.Item
            onPress={() => {
              console.log('Option 1 was pressed');
            }}
            title="Option 1"
          />
          <Menu.Item
            onPress={() => {
              console.log('Option 2 was pressed');
            }}
            title="Option 2"
          />
          <Menu.Item
            onPress={() => {
              console.log('Option 3 was pressed');
            }}
            title="Option 3"
            disabled
          />
        </Menu>
      ) : null}
    </Appbar.Header>
  );
}
Final result:
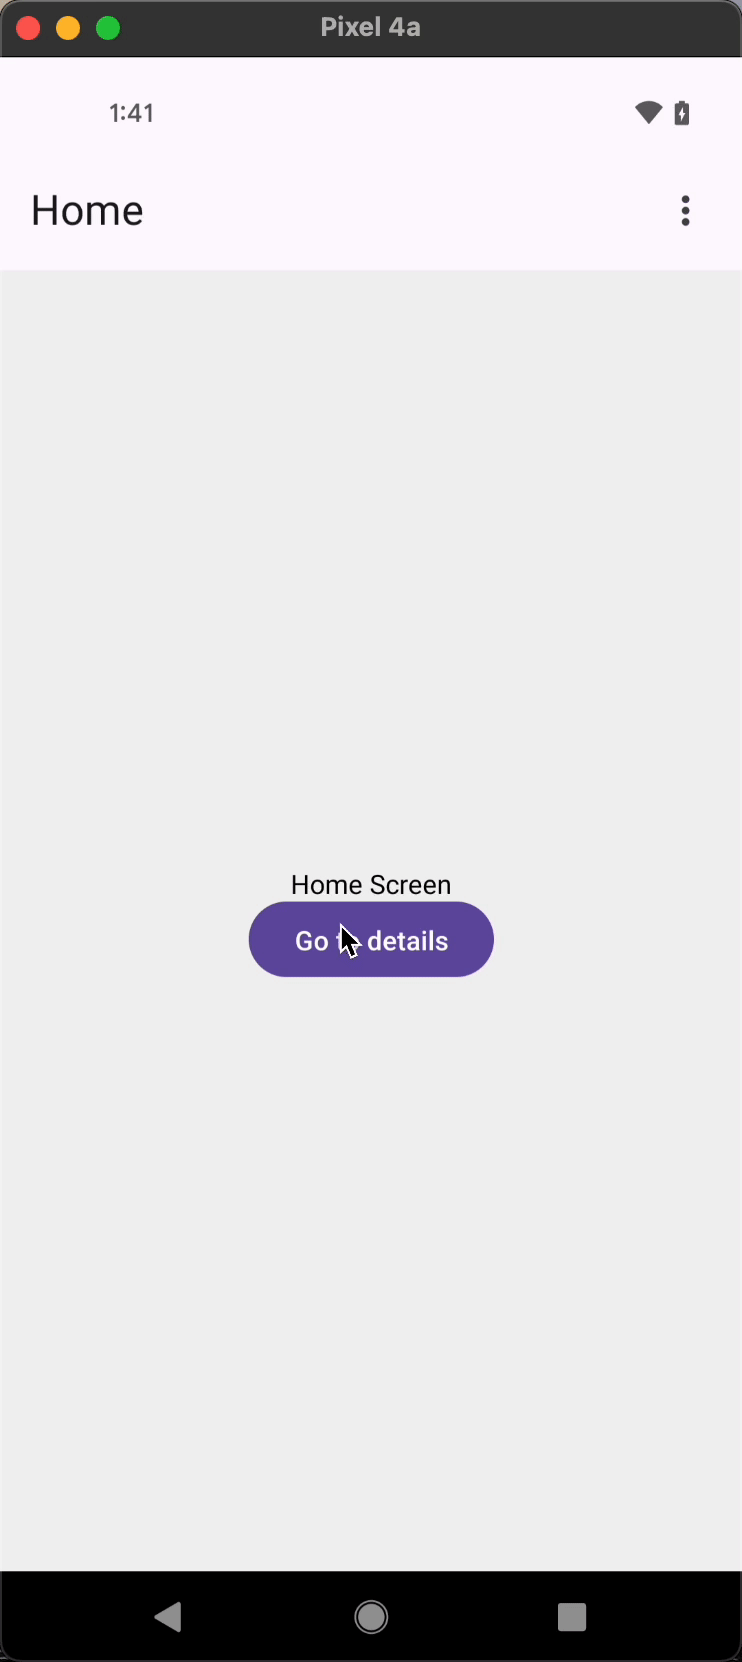
That's all we need! We have app bar that contains everything we need to navigate through screens and access an additional menu on the main screen. As you can see, with Material design Appbar provided by react-native-paper used together with react-navigation we can easily create an app that looks and works great.
Grab the Expo snack if you want to check the whole code!